Now that the Noah's Ark quilt has been delivered to Miss N as a present for her first birthday I can post some pictures. This quilt was pieced BEFORE I'd figured out the problem with my 1/4 inch seams so some of the joins are not as nice as I'd like them. Overall, I like the way it came out.
Lot's of "fussy cutting".
I had the quilt machine quilted by someone in a neighboring town. We decided on fluffy clouds to match the backing fabric.
Happy Birthday Miss N!!!!!
My Blog List
Sunday, December 28, 2008
Friday, December 19, 2008
BOM VII
BOM VII arrived and I promptly pieced it together with my new 1/4 inch foot. BOM VI turned out great once I figured out how to get a perfect seam with the presser feet I had. The 1/4 inch foot was already on it's way so I decided to keep it. Block VII was designed by Debbie Beaves and is called Sawtooth Patchwork Block.
Look at those points! Look at those seams! Perfect!
After I finished this block, I compared VI and VII with the first 5. I can't live with them. None are the correct finished size and the points and seams aren't quite right. I contacted the BOM people and ordered another set of the first 5 blocks. At first I couldn't believe that I could chuck the wonky ones away but hey, there is a lot of work going into this quilt and I will not be happy with the outcome if I let this go. I'll just cut my losses now and redo them. I'll repost the before and after's when I'm done.
Monday, December 15, 2008
Extremely Fun Pillow Cases
I've been on a roll lately with the pillow cases. Probably because I like sleeping so much. :) I found this book at Michael's Craft store and couldn't resist. This little book is filled with the best projects for bags, pillow cases and more. Good way to use up those fabric pieces. So far I've made 2 of the pillow case projects from the book for my 2 great nephews...the lion and the shark.
The front end (can you see the legs hanging on the side?):
The back end:
The shark:
They are both very cute but I have to say that I like the shark best. The batik fabric I found with the fish on it was perfect. One thing I learned from this, shark's teeth are way easier to make than a lion's mane!
The front end (can you see the legs hanging on the side?):
The back end:
The shark:
They are both very cute but I have to say that I like the shark best. The batik fabric I found with the fish on it was perfect. One thing I learned from this, shark's teeth are way easier to make than a lion's mane!
Monday, December 8, 2008
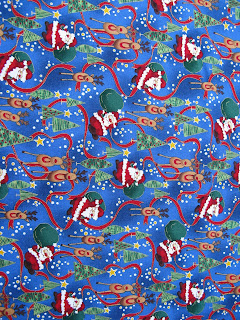
Christmas Pillow Cases/ DSL Hell
I didn't know what to title today's post. I have been living in DSL hell for about a month. I'm waiting for the Verizon technician as I write this and hope that I don't lose my connection before I'm finished. Enough about that. I love making pillow cases. They are an inexpensive, easy project with very fun results. I made these for my friend's 3 girls. They had a 40% off sale at Joann's on Debbie Mumm holiday fabric...how could I resist.
I have 2 more in the works that are..."different". I'll post those as soon as I'm finished.
Wednesday, November 26, 2008
BOM VI
I can't believe it took me constructing 5 blocks before I realized that my 1/4 inch seems were a little wide. I had a very hard time with BOM V. I needed to get this problem resolved before the next block arrived. I started playing around with the different presser feet that I have for my machine and discovered that if I use my #0 foot and move my needle one position to the right that I get a perfect 1/4 inch seem. You wouldn't think that the little bit that I was off would make such a big difference but the more pieces in the block the more the problem escalates. I'm very happy with BOM VI. It's called Sunrise Star and it was designed by Margot Languedoc. The points are all lined up nicely and the finished block is the right size. I'm so happy!
Wednesday, November 19, 2008
Travelling Casserole
I saw this cool casserole carrier in an issue of Crafts 'n Things. There is a piece of cotton batting sandwhiched between the two layers of fabric so it acts like a hot pad too. First you create 2 rectangles...cotton batting between the outer fabric and the lining. Next, you lay one piece over the other to form a cross. Stitch along the 4 borders where they meet. Add some ribbon to form a casing. Slip wooden dowels through the ribbon to create handles. Add velcro to the other two ends and done. Very simple and very handy.
This picture shows the carrier after construction...all laid out, lining side up.
Next, place your 9 x 13 inch casserole dish in the center (preferably with food in it).
Then bring the velcro ends up to meet each other and fasten. One piece of velcro is attached to the lining side and the other to the outer side.
The wooden dowels are easily removed so that the casserole carrier can be washed.
Tuesday, November 11, 2008
My First Time...Shirring That Is.
Remember the pleating tutorial? Well, it's finally finished. The smocking took longer than I expected but the thing that was really holding me back was the thought of shirring the back. I've been sewing a long time and it has never come up. Basically, it's a form of gathering. You buy good quality elastic thread. You have to hand wind your bobbin, putting slight tension on the elastic as you go. You use regular thread in the needle. Then you just sew. Yea, right. Might as well give it a try since the back was 3 times wider than the front and something had to be done. I didn't take pictures of the process but basically I placed lines along the back where I needed to sew and then jumped in. Oh yea, don't back stitch at the beginning and end. I have to say that it was very easy and I'm pleased with how it turned out. You can actually move the fabric along the sewn lines to bring it in more. Heavier fabric requires more tension on the elastic thread when you are winding the bobbin. I started with 8 rows of shirring but ended up with 7. I snapped the thread on one of the rows but luckily it was the last one. Anyway, here is my completed smocked sun dress using one of my favorite fabrics from Amy Butler's Midwest Modern collection.
Full view:
Close up of smocking:
The shirring:
A very cute pin:
So pretty!
Full view:
Close up of smocking:
The shirring:
A very cute pin:
So pretty!
Monday, November 3, 2008
BOM V
Also known as "Peppermint Star" by Vicki Bellino. I've been struggling with pieced quilt block squares lately. Not sure what my problem is because I'm so careful when I cut and sew. Ugh. This block should have been 12 1/2 inches square when done but only measured in at 11 1/2 inches square! I'm not happy since I somehow managed to end up with 12 1/2 squares with the first 4. I talked this over with my friend Lisa and discovered that the presser foot that I've been using is NOT the 1/4 inch presser foot for my machine. Are you shi(*(*& me? It's more like a weak 3/8ths or very strong 1/4 inch. When piecing blocks with many pieces it's very important to sew seams that are exactly 1/4 inch. I'm going to have to put a 1/2 inch border around this guy when I make the quilt so that it all fits together nicely. I've since gone out and ordered the 1/4 inch foot from Bernina and I'm anxiously awaiting its arrival. Here is the horizontally and vertically challenged BOM V.
Friday, October 31, 2008
Wednesday, October 29, 2008
"Thank You" Totes
My daughter recently got married! She planned and executed the whole thing in 2 1/2 months. Hard to believe but when she makes her mind up about something...well let's just say, "Get the hell out of the way"! She did have help though. Three of her friends did a lot of work and helped make the reception a success. She wanted to thank them in some way. I suggested she make them totes from some Alexander Henry fabric. We came up with a plan. I cut all the pieces out for the bags. I went to her house one Saturday and we set up shop. I pressed and pinned and she sewed. It took us about 3 1/2 hours but we did get it done in one day. She is a beginner but you'd never know looking at these bags! She did a great job and her friends loved them.
The other lady in the house...not so much help.
Friday, October 24, 2008
Dear Skie
As you well know, there is a new handmade quilt living with you. I can only imagine your excitement when you first laid eyes on this new potential playground...tail wagging, body wiggling, tongue hanging. I'm here to ask you to "Just Say No"! "Just Say No" to playing tug of war with the quilt. "Just Say No" to dragging it around the house to see how many things you can knock over. "Just Say No" to gripping it by a corner and dragging it through the doggie door and into the back yard for who knows what fate. "Just Say No"! There will be an extra treat for you next time I see you and a big hunk of fleece to take it's place. :)
The quilt I made my daughter and her husband. Fabric is from the City Girl collection. I LOVE it.
Monday, October 20, 2008
Another Helping of Pumpkin Pie Anyone?
Well, I'm up for another slice. Here's baby N sporting her pumpkin hat.
And, in case you don't remember, you can see the first course here.
I think everyone should have one...don't you?
And, in case you don't remember, you can see the first course here.
I think everyone should have one...don't you?
Tuesday, October 14, 2008
Amy Butler's Birdie Sling Bag
A friend of my daughter always comments on the bags I make her. Occasionally, her friends ask if I make things for money. I don't like the idea of that because I like to make what I want, when I want. I did agree to make a bag for Miss Sarah. She gave me free reign. She has a little one so she wanted a fairly good sized bag. She also told me that she likes greens and blues. Ok...armed with that information I decided on the Birdie Sling Bag by Amy Butler. I wanted to use fabric from her new decorator fabric collection, August Fields. I've made a few things using Amy Butler patterns and I'm not always happy with the way things go together. This bag however, was a pleasant surprise. It went together well and there weren't and "challenging" areas. The handle is comprised of two pieces...one for the outer layer and the other for the lining/underside. The outer layer as well as the lining is cut from one piece of fabric. As I was getting ready to sew it together, I realized that the directional fabric I used for the handle was going to throw the handle off. The pattern would be going up one side and then down the other. Yuck. I cut the 2 handle pieces in half right at the shoulder. I then sewed them back together using one half from the outer layer and the lining for each new handle. The outer handle now has the fabric direction going the same way. The lining section is going in the opposite direction. I don't mind that so much because it's the lining and at least it's consistent. I really like the bag and would make it again. The August Fields fabric seems heavier to me than Amy Butler decorator fabric in past collections. I would probably use a regular weight cotton next time.
The bottom of the handle is very wide. It starts in the front, wraps around the side and finishes in the back. If I hadn't rearranged the handles the way I did, you would see the pattern on the left side going in the opposite direction as the right side. This is much better.
There are also 2 very nice pockets...one small and one large.
Hope she likes it!
The bottom of the handle is very wide. It starts in the front, wraps around the side and finishes in the back. If I hadn't rearranged the handles the way I did, you would see the pattern on the left side going in the opposite direction as the right side. This is much better.
There are also 2 very nice pockets...one small and one large.
Hope she likes it!
Friday, October 3, 2008
I'm Stingy With My Hand Knit Socks
That's usually my motto when I make socks. I'm very generous with everything else but socks is a differnt matter. They take me a while to knit and I absolutely love wearing them and of course they are so nice to look at. That said, by the time they are off the needles I can't think about giving them up. BUT, I did just that recently. My neighbor has always admired my socks. She's like a real fan. I knew she would really appreciate them and I had the perfect yarn that would suit her. It took me most of the summer but they are complete and in her posession. She LOVED them. Here they are:
I used the Peak Experience pattern from Fiber Trends.
It's good she lives close by. I can visit them if I need to. :)
BTW...There's a new blog in town. Stop by and check out MrsMamaMia. If this blog ends up half as good as her cooking then we are in for a treat!
I used the Peak Experience pattern from Fiber Trends.
It's good she lives close by. I can visit them if I need to. :)
BTW...There's a new blog in town. Stop by and check out MrsMamaMia. If this blog ends up half as good as her cooking then we are in for a treat!
Tuesday, September 30, 2008
Pumpkin Hat Part II & Pumpkin Pie
Monday, September 22, 2008
Fall is in the air!
Fall is in the air and I love it! It's my favorite time of year. I love the color in the trees and the crispy air. To celebrate Fall, I crocheted this very cute little pumpkin hat.
I don't do much crocheting but every now and then I get the urge. I think it was one of the first crafts I learned how to do. My Grandmother crocheted and she taught me. She couldn't read patterns and did everything from memory. Good thing I can read patterns cuz I can't remember sh&^*&^&! The one nice thing about crocheting is that you can complete a project quickly. I used Debbie Bliss Baby Cashmerino for this project. I couldn't decide between this shade of orange and another that was available so I bought both. Stay tuned for Pumpkin Hat part II.
Tuesday, September 16, 2008
BOM IV
Thursday, September 11, 2008
Quick "Hello"
I've actually got 2 really great, nearly finished projects to show you but I'm worried that the recipients might see them and guess that they are for them. I'm pretty caught up with my sewing projects and of course I'm looking for a new one. My current purse is getting a little worn so I thought I'd make a new one. I've decided on an Amy Butler pattern...The Madison, and some of her fabric from the Nigella collection. I like the weight of this fabric. It's a bit heavier and great for bags.
My fourth Mystery Block of the Month should be in any day. Good timing. I'll be able to get right to it and stay on schedule. Oh yea, I also finished one more block from my Anna Maria Horner Garden Party quilt. Three done and 6 to go! These block are big. 17 inches x 17 inches and they have a lot of little pieces. I'm trying to make at least one between other projects so that it will get done this year. I'll get some sashing and backing fabric once all the blocks are done and put together.
Tuesday, September 2, 2008
A Bowl of Key Fobs!
They are done. Can you say "HalleluYah"! I made 50 of them. Actually, it was not bad at all. I set up a mini assembly line for myself and got to work. Take a gander...aren't they pretty?
On another note...there's a new blog in town. Introducing Nicole! Good job Nicole. She's very talented and does just about everything. SO, if you like crafting you should check it out. You won't be disappointed. :)
Gotta go now. Miss L needs to go out.
On another note...there's a new blog in town. Introducing Nicole! Good job Nicole. She's very talented and does just about everything. SO, if you like crafting you should check it out. You won't be disappointed. :)
Gotta go now. Miss L needs to go out.
Subscribe to:
Posts (Atom)